以最佳实践开始你的Django项目
文章目录
“How long will it take to fix that?” One person, who’d been at the company for years, said, “Three months.” A new person, who’d just come from a world of rapidly provisioned cloud microservices, said, “Three minutes.” They were both correct. That’s how change enters into this world – what is code
前言
我近年写过的Django项目基本都采用cookiecutter-django来启动
Cookiecutter Django is a framework for jumpstarting production-ready Django projects quickly.
cookiecutter-django将帮助你快速构建一个生产可用的项目骨架,通过初始化项目时回答几个问题,你将开箱得到许多常用的东西(往往遵循最佳实践),而避免配置
cookiecutter-django由pydanny构建,pydanny写过一本Django最佳实践相关的书《Two Scoops of Django》
cookiecutter-django介绍
cookiecutter-django相关的信息,项目readme里写的很清楚,我简单做些脚注
Features
- For Django 2.0
- Django 2.0的新特性可以看这里
- Works with Python 3.6
- Renders Django projects with 100% starting test coverage
- Twitter Bootstrap v4.0.0 (maintained Foundation fork also available)
- 12-Factor based settings via django-environ
- Secure by default. We believe in SSL.
- Optimized development and production settings
- Registration via django-allauth
- 可以很轻松做到第三方登陆/绑定(oauth)
- 关于这个项目致力于解决的问题可以看这里
- Comes with custom user model ready to go
- Grunt build for compass and livereload
- 前后端分离,不需要这个
- Send emails via Anymail (using Mailgun by default, but switchable)
- 邮件发送的调试是个繁琐的问题,Mailgun堪称完美的解决方案
- Media storage using Amazon S3
- 国内使用S3可能有坑,我偏向使用七牛云
- Docker support using docker-compose for development and production (using Caddy with LetsEncrypt support)
- 尽管这个项目不强制使用docker,但我十分偏好docker
- Procfile for deploying to Heroku
- 国内用不到
- Instructions for deploying to PythonAnywhere
- 国内用不到
- Run tests with unittest or py.test
- Customizable PostgreSQL version
- PostgreSQL支持json,参考PostgreSQL specific model fields
Documentation
我倾向于使用docker,文档在Getting Up and Running Locally With Docker
建议有空多翻阅文档,文档里把开发和部署的大多数问题都谈论了
一些docker命令偏长,可以自行写个makefile
服务器的远程管理,推荐使用fabric,ansible比较重
optional-integrations
- Serve static files from Amazon S3 or Whitenoise
- 我偏向把文件存于本地,之后使用七牛云做镜像到本地,来分发(CDN),使用Whitenoise就不必使用nginx来处理静态文件了
- 关于文件管理可以看下Caddy的插件filebrowser
- Configuration for Celery
- Integration with MailHog for local email testing
- Integration with Sentry for error logging
- 错误提醒及时(邮件通知),错误信息详细
- 可以直接使用官方的云平台,不必自己搭建,目前国内可以正常使用
使用笔记
创建项目
我们使用cookiecutter替代django-admin startproject来初始化项目.
首先安装依赖pip3 install "cookiecutter>=1.4.0"
接着开始创建项目cookiecutter https://github.com/pydanny/cookiecutter-django,你讲被要求回答几个问题,关于项目的信息,以及你需要的组件,我的回答见: start_django_project.md
运行项目
我使用docker来运行项目,我们需要安装:
- Docker
- Docker Compose:
pip3 install docker-compose
Build the Stack
docker-compose -f local.yml build
生产环境使用production.yml替代local.yml
第一次build需要一断时间
如果你添加了python库,需要重新build,不过所花时间要少很多
Run the Stack
docker-compose -f local.yml up
或者
|
|
Execute Management Commands
|
|
以上每个进程都跑在一个单独的容器中(无状态),进程结束即销毁,数据库使用公共的(由docker-compose up之前启动的)
其他
- Mailhog跑在
http://127.0.0.1:8025 - 数据备份
- 备份:
docker-compose -f local.yml exec postgres backup - 列出:
docker-compose -f local.yml exec postgres backups - 复制到本地:
docker cp 9c5c3f055843:/backups/backup_2018_03_13T09_05_07.sql.gz . - 从本地恢复:
docker-compose -f local.yml exec postgres restore backup_2018_03_13T09_05_07.sql.gz
- 备份:
一些个人意见
下边是一些围绕构建一个django项目,我个人所采取的一些策略
用户系统
用户账号相关的页面由后端做(django-allauth基本都做了,这部分逻辑考虑步骤可能会有安全问题),此外部分前后端分离
如果希望注册和登陆更灵活(提供REST接口),可以使用django-rest-auth。django-rest-auth做的主要工作是让django-allauth暴露出API。
关于User model
如果你对django自带的User model感到满意, 只是想额外增加field的话, 你可以扩展AbstractUser类,pydanny在《Two Scoops of Django》讨论过这块,提到有几种策略。扩展AbstractUser是第一种,目前cookiecutter-django用的也是这种
添加django-rest-auth
添加依赖之后,记得docker-compose -f local.yml build
django-rest-auth暴露出以下API
http://127.0.0.1:8000/rest-auth/user/将允许你在web页面调试获取用户数据和注册用户http://127.0.0.1:8000/rest-auth/registration/中注册成功之后,验证邮箱会出错,解决方案参考ImproperlyConfigured at /rest-auth/registration/account-confirm-email,直接使用allauth提供的confirm_email即可- 登陆(换取token): http POST http://127.0.0.1:8000/rest-auth/login/ username=django password=django123
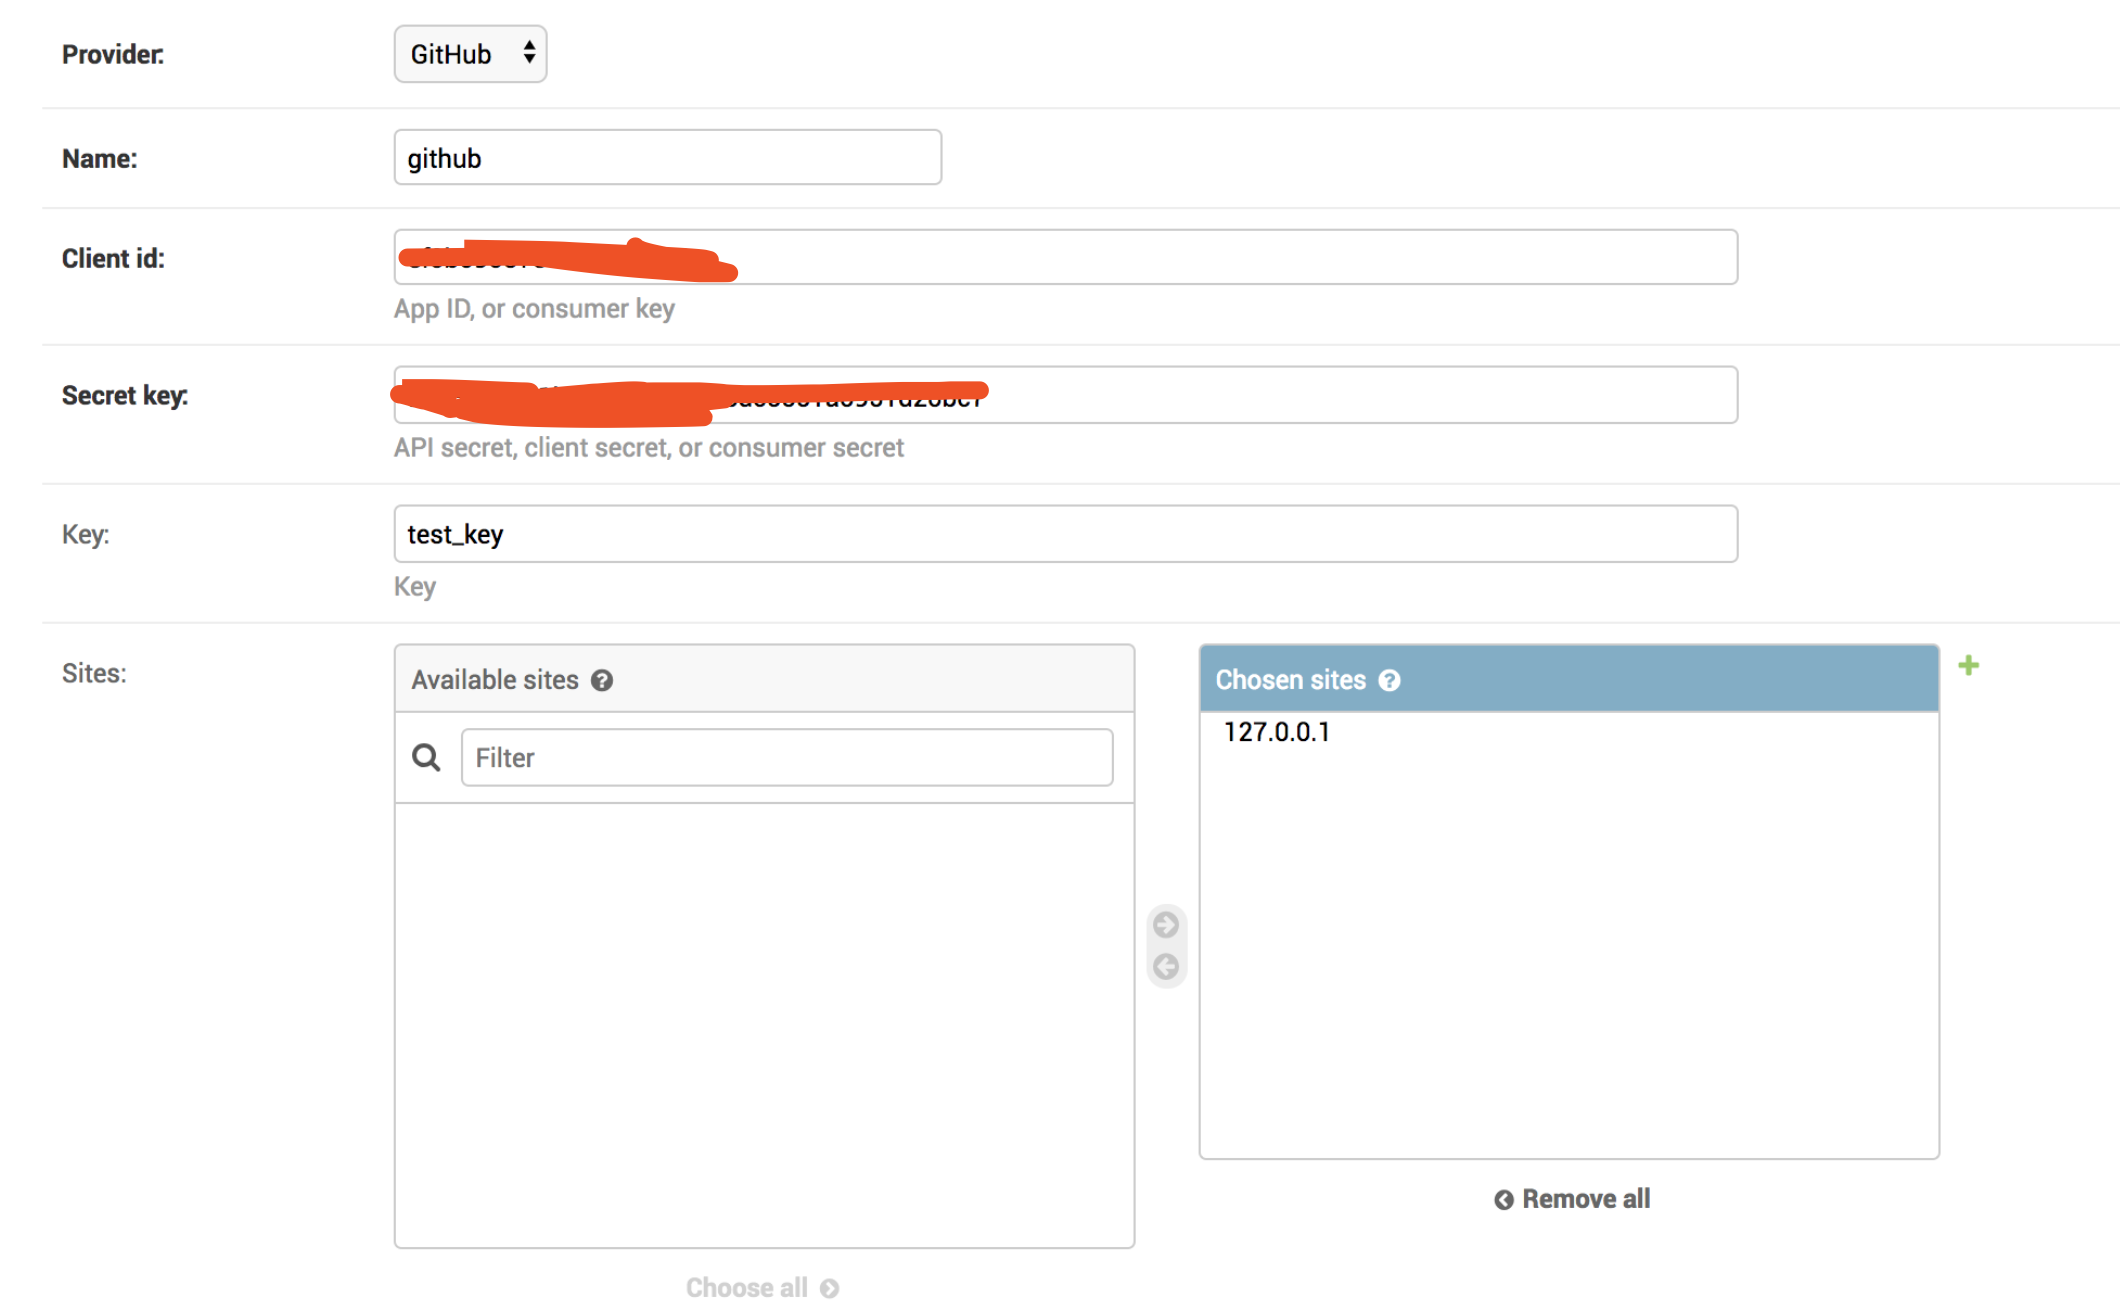
github登陆
记录一下,配置github登陆的流程
- 添加INSTALLED_APPS : Installation
- 到github注册client: providers github
- 在admin中配置github信息: http://127.0.0.1:8000/admin/socialaccount/socialapp/
开发者协同
- git pull
- docker build
- 数据库分发备份
表单
- 采集数据的表单,可以由后端来做,然后放在django admin里管理
- admin + 表单十分迅速
参考
文章作者 种瓜
上次更新 2018-06-21