Scratch在七月底举行了一个大会:conference, 大会上, scratch团队向大家介绍了即将推出的Scratch 3.0, 赶在会议开始之前,scratch团队完成了对micro:bit的官方支持,项目页连同使用说明也正式上线:microbit
scratch与micro:bit作为全球最有名的两个少儿编程项目(分别是软件和硬件),能够结合在一起,太振奋人心。之前社区里大家就围绕这块在做许多探索,如:
尝鲜
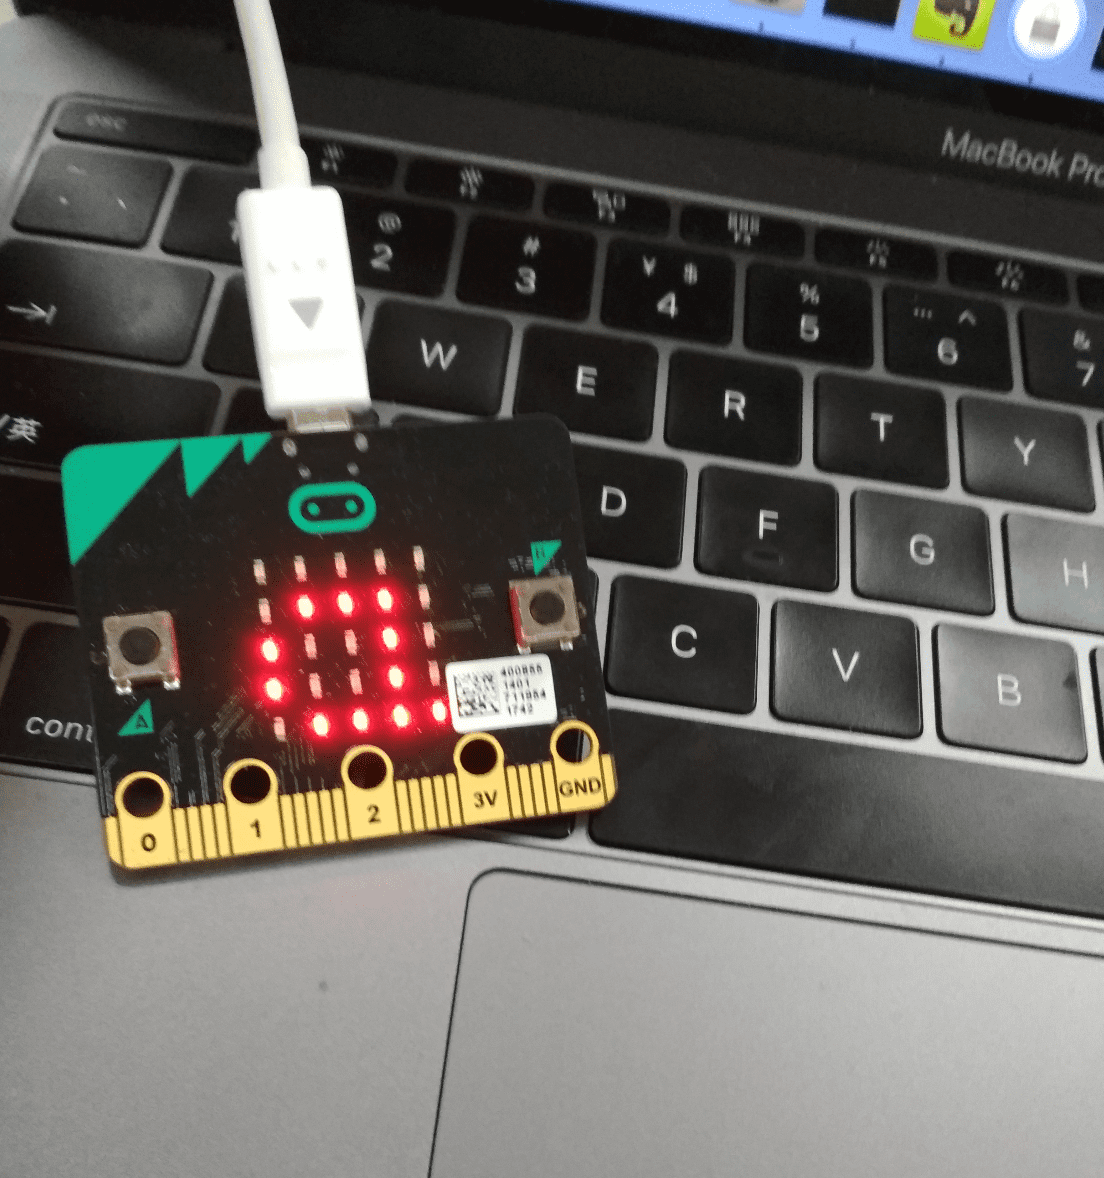
只要你手边有micro:bit就可以开始体验了.
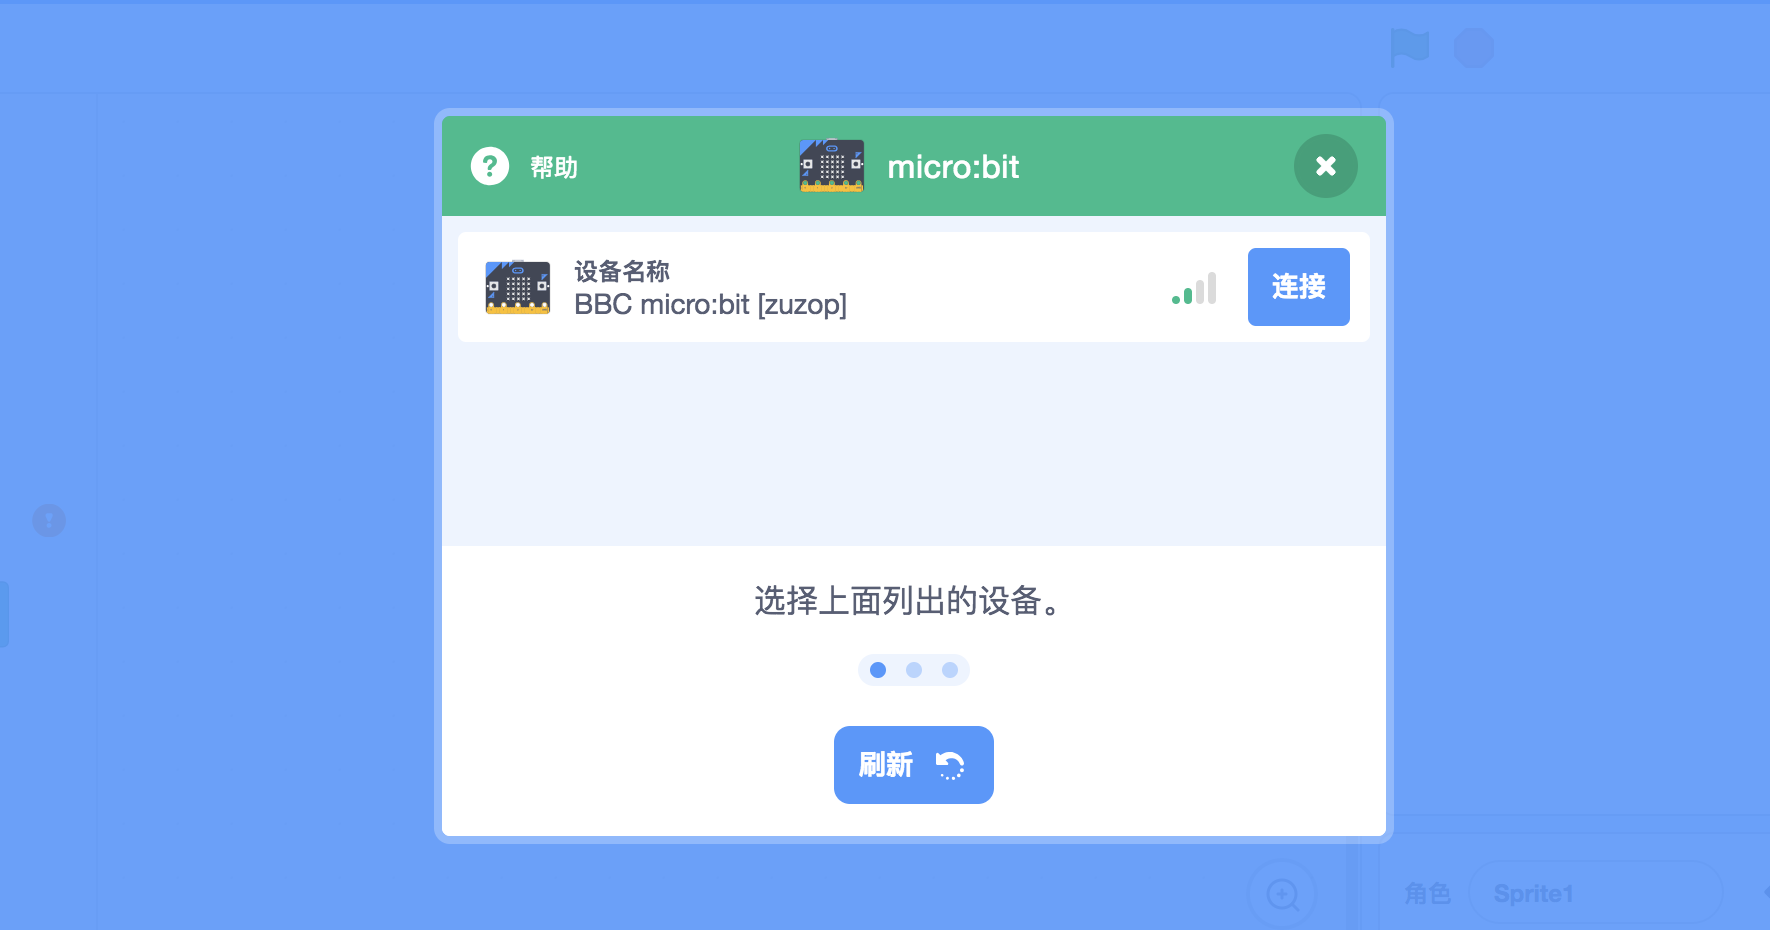
按照使用说明,将micro:bit接入scratch3.0毫无障碍:
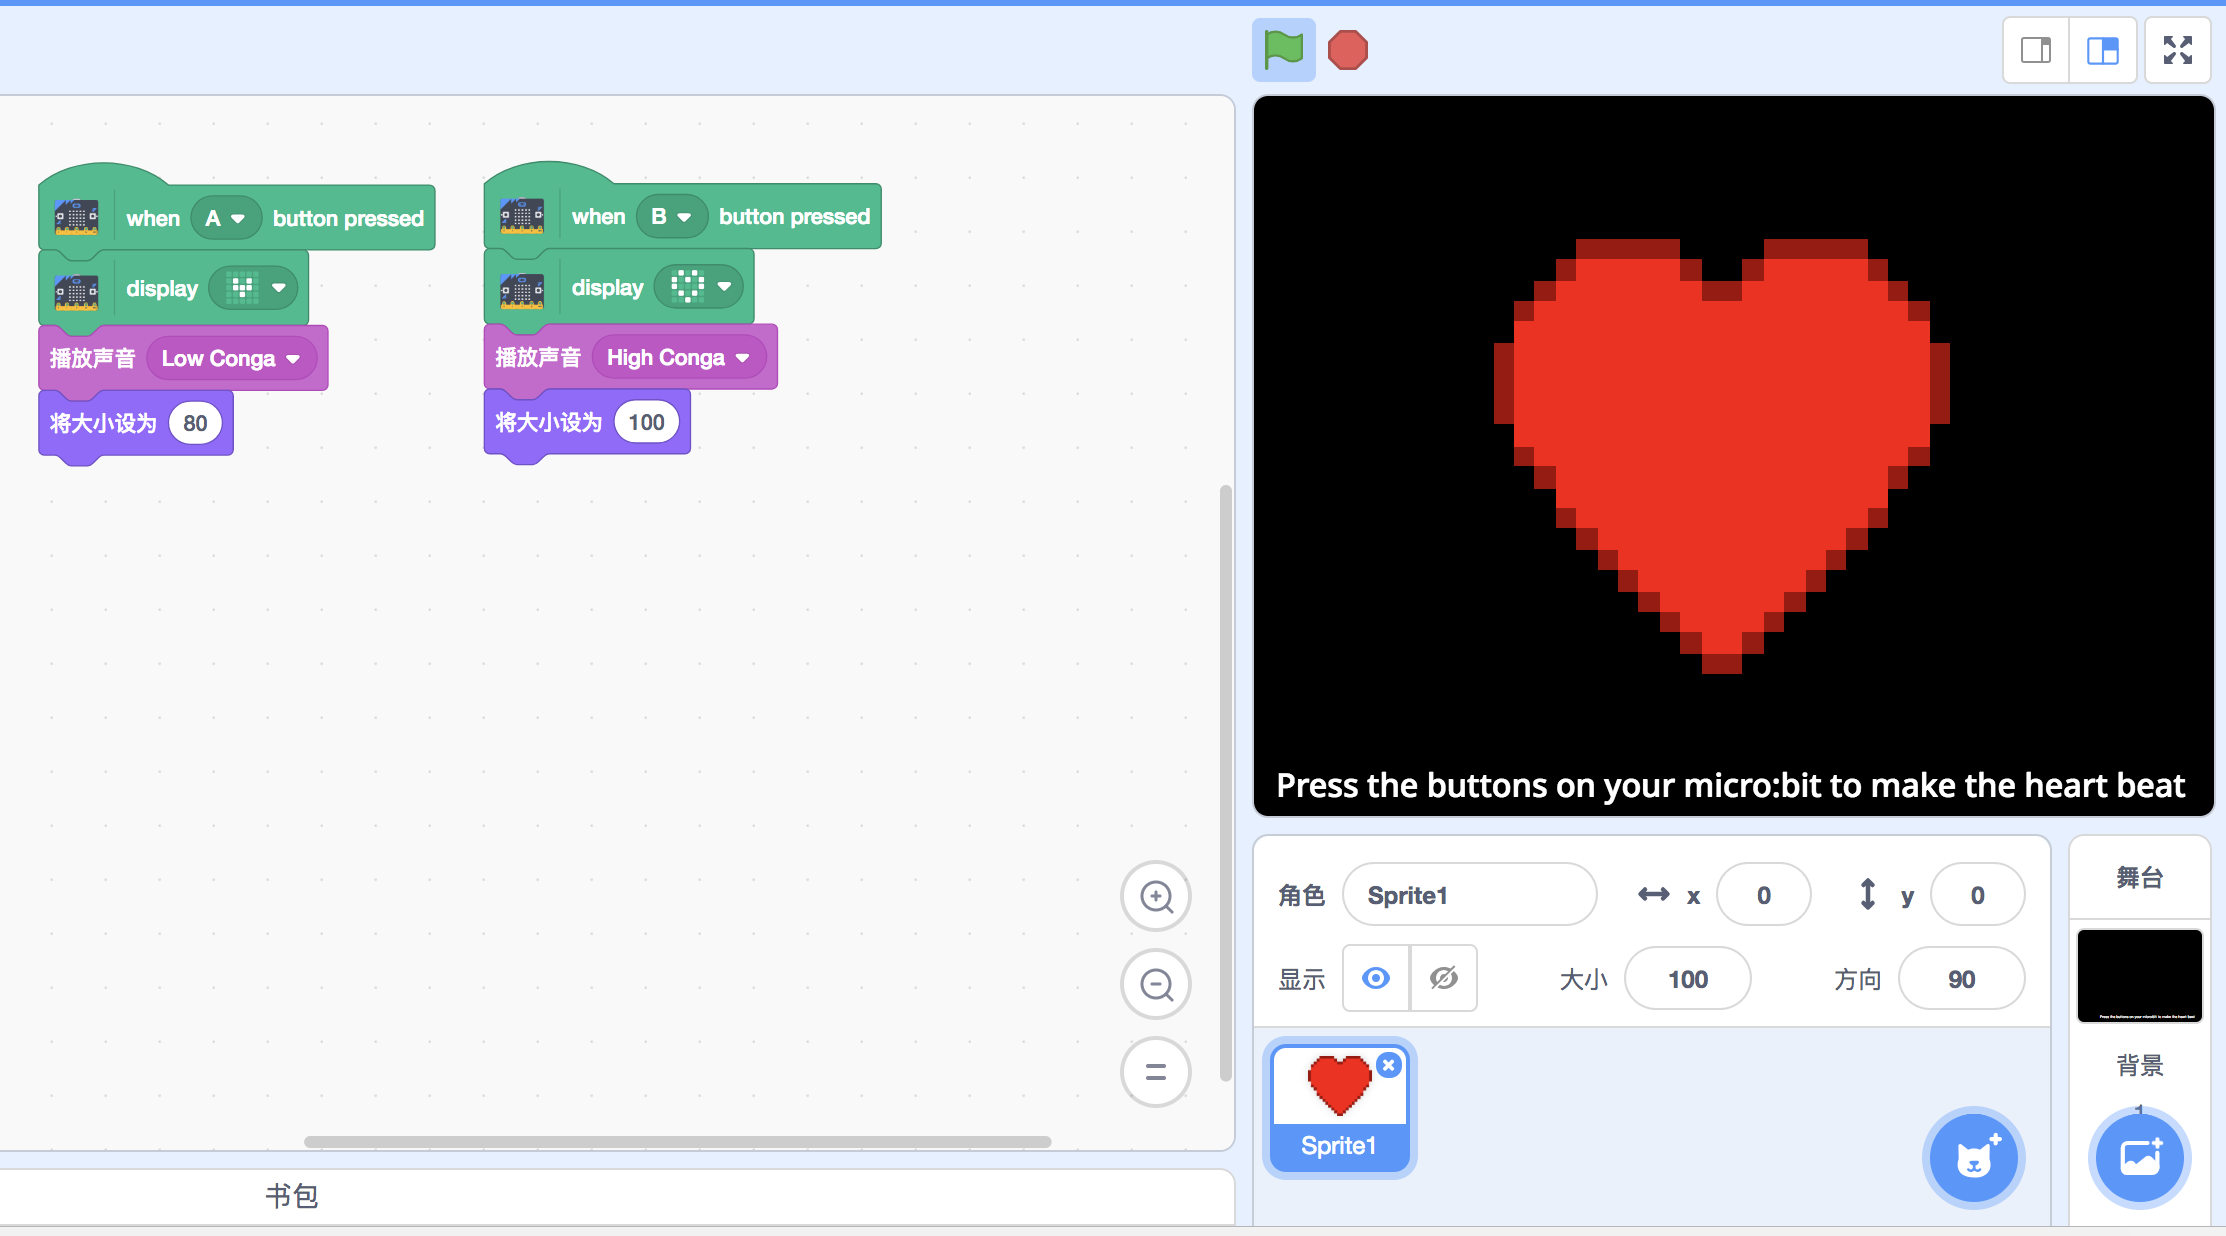
完成连接后就可以开始你的创作了,使用说明页面里给出了几个例子,大家可以从这儿入手
原理
体验完scratch与micro:bit的互动,我们来分析一下官方是如何做到的。
回顾使用说明和体验过程,容易猜到Scratch Link起代理的作用,Scratch Link在内部跑了一个websocket服务,允许网页与其交互,同时在启动时扫描周围的BLE设备
思路和codelab-adapter几乎完全一致
Scratch Link与codelab-adapter的不同之处有:
- Scratch Link目前不支持扩展,似乎也没计划开源,原因可能我猜测是Scratch Link将支持乐高机器人,而乐高机器人是闭源商业项目。codelab-adapter允许你自行扩展
- Scratch Link在使用上更为简易
- codelab-adapter兼容更多的系统环境以及支持所有的开源硬件
Scratch Link在易用性上做得非常好,这也codelab-adapter准备向它学习的地方。codelab-adapter的目标之一是完全兼容Scratch Link的功能
这篇文章就来分析一下官方在这块的巧思。以便于我们可以将其用到其他地方。
分析
推断
从scratch的micro:bit extension来看,Scratch Link仅仅只是一个代理,scratch与micro:bit的交互逻辑都在micro:bit extension中。
所以我们暂时不必使用wireshark抓包分析,而仅仅通过阅读micro:bit extension,应该就能知道通信的细节,之后我们使用gatttool来验证。
如果你对BLE/GATT相关的概念不熟悉,可以看看我之前的文章:BLE学习笔记
从micro:bit extension源码里我们可以找到micro:bit里跑的服务和属性的uuid,也正是这个证据,让我们猜测Scratch Link只是个透明代理
1
2
3
4
5
|
const BLEUUID = {
    service: 0xf005,
    rxChar: '5261da01-fa7e-42ab-850b-7c80220097cc',
    txChar: '5261da02-fa7e-42ab-850b-7c80220097cc'
};
|
对比lancaster大学的Bluetooth Developer Studio Level 3 Profile Report,可知scratch自己重写了很多东西,而没有使用现成的UART service,这点我颇为不解。
展开追踪
我们接着来跟踪一下A button pressed?这个积木涉及的通信过程,从一个具体例子里突破。经过这个例子,我们对整个通信流程应该会有一个整体的了解,之后我们再对不同类型的积木逐类探索。
GATT 通信的双方是 C/S 关系, 为了知道micr:bit上A按钮的状态,一般采用两种方式:
- 其一是利用GATT的通知机制,每当按钮状态变化时,通知给电脑(Scratch Link会把消息代理给scratch)
- 其二是每当
A button pressed?积木被触发时,主动去read相应的属性值。
scratch-gui/microbit应该是用这两种方式中的一种
但micro:bit extension有些特殊,它构建了UART service,之后的的数据都走UART service,逻辑上这更像经典的串口通信。只是实现在GATT上而已。
从源码中可以看到buttonA是否按下取决于 this._device.buttonA
而this._device = new MicroBit(this.runtime, Scratch3MicroBitBlocks.EXTENSION_ID);
顺藤摸瓜,可以跟踪到
 1
 2
 3
 4
 5
 6
 7
 8
 9
10
11
12
13
14
15
16
17
18
19
20
21
22
23
24
25
26
27
|
    /**
     * Process the sensor data from the incoming BLE characteristic.
     * @param {object} base64 - the incoming BLE data.
     * @private
     */
    _processSessionData (base64) {
        // parse data
        const data = Base64Util.base64ToUint8Array(base64);

        this._sensors.tiltX = data[1] | (data[0] << 8);
        if (this._sensors.tiltX > (1 << 15)) this._sensors.tiltX -= (1 << 16);
        this._sensors.tiltY = data[3] | (data[2] << 8);
        if (this._sensors.tiltY > (1 << 15)) this._sensors.tiltY -= (1 << 16);

        this._sensors.buttonA = data[4];
        this._sensors.buttonB = data[5];

        this._sensors.touchPins[0] = data[6];
        this._sensors.touchPins[1] = data[7];
        this._sensors.touchPins[2] = data[8];

        this._sensors.gestureState = data[9];

        // cancel disconnect timeout and start a new one
        window.clearInterval(this._timeoutID);
        this._timeoutID = window.setInterval(this.disconnectSession.bind(this), BLETimeout);
    }
|
注释里说得很清楚:
1
2
|
     * Process the sensor data from the incoming BLE characteristic.
     * @param {object} base64 - the incoming BLE data.
|
从逻辑和语义上,可以看出_processSessionData是个回调函数,micro:bit会通过串口源源不断把它自身的状态数据(sensor data)不断发给_processSessionData, 如此一来,scratch就能得知microbit的A按钮是否按下,为了验证我们的想法,我们得继续跟踪:this._ble.read(BLEUUID.service, BLEUUID.rxChar, true, callback);
1
2
3
4
5
6
7
8
|
    /**
     * Starts reading data from device after BLE has connected to it.
     */
    _onSessionConnect () {
        const callback = this._processSessionData.bind(this);
        this._ble.read(BLEUUID.service, BLEUUID.rxChar, true, callback);
        this._timeoutID = window.setInterval(this.disconnectSession.bind(this), BLETimeout);
    }
|
_ble看去是个通用的抽象io(BLESession),_ble.read在语义上类似UART read,只是实现上是基于GATT的,如果你熟悉GATT,至此应该基本都猜到了。当然我们会继续剖析。
 1
 2
 3
 4
 5
 6
 7
 8
 9
10
|
    /**
     * Called by the runtime when user wants to scan for a device.
     */
    startDeviceScan () {
        this._ble = new BLESession(this._runtime, {
            filters: [
                {services: [BLEUUID.service]}
            ]
        }, this._onSessionConnect.bind(this));
    }
|
跟踪到BLESession类里, BLESession继承自JSONRPCWebSocket, 这里提示我们scratch与Scratch Link是如何通信的,基于WebSocket,同时使用远程调用的概念, RPC使用起来要比流简单很多。这是scratch官方很聪明的举措之一,我们在文末的tips里还将列出官方其他的聪明做法
如果你不打算自己实现类似Scratch Link的东西,JSONRPCWebSocket不必太关注。我实现了类似Scratch Link的codelab-adapter,但使用的是消息通信,策略上和scratch团队不大一样。这块我们先不细说
回到BLESession上边,我们前头关注_ble.read,在此将看到它的实现:
 1
 2
 3
 4
 5
 6
 7
 8
 9
10
11
12
13
14
|
    read (serviceId, characteristicId, optStartNotifications = false, onCharacteristicChanged) {
        const params = {
            serviceId,
            characteristicId
        };
        if (optStartNotifications) {
            params.startNotifications = true;
        }
        this._characteristicDidChangeCallback = onCharacteristicChanged;
        return this.sendRemoteRequest('read', params)
            .catch(e => {
                this._sendError(e);
            });
    }
|
micro:bit extension对它的调用是:
this._ble.read(BLEUUID.service, BLEUUID.rxChar, true, callback);
至此,我们就搞懂了A button pressed?是如何实现的,optStartNotifications被设置为True,语义上是接受通知,当micro:bit上数据变化时,及时通知给scratch。技术层面使用了GATT的
客户端可以请求服务器通知一项特征
关于这点,我们在BLE学习笔记有提到
因为弄懂了A button pressed?,所以When A button pressed积木也不难理解,当然这需要你熟悉:scatch的HAT类型的积木(事件风格)。源码一目了然
 1
 2
 3
 4
 5
 6
 7
 8
 9
10
|
    whenButtonPressed (args) {
        if (args.BTN === 'any') {
            return this._device.buttonA | this._device.buttonB;
        } else if (args.BTN === 'A') {
            return this._device.buttonA;
        } else if (args.BTN === 'B') {
            return this._device.buttonB;
        }
        return false;
    }
|
关于write
既然我们分析完read,顺手看一下write的实现,直接上源码
 1
 2
 3
 4
 5
 6
 7
 8
 9
10
|
    write (serviceId, characteristicId, message, encoding = null) {
        const params = {serviceId, characteristicId, message};
        if (encoding) {
            params.encoding = encoding;
        }
        return this.sendRemoteRequest('write', params)
            .catch(e => {
                this._sendError(e);
            });
    }
|
没什么需要特别说的
我们以一个使用write的积木为例,来看看具体的细节,以display text为例:
 1
 2
 3
 4
 5
 6
 7
 8
 9
10
11
12
13
14
15
16
17
18
|
    displayText (text) {
        const output = new Uint8Array(text.length);
        for (let i = 0; i < text.length; i++) {
            output[i] = text.charCodeAt(i);
        }
        return this._writeSessionData(BLECommand.CMD_DISPLAY_TEXT, output);
    }

    _writeSessionData (command, message) {
        if (!this.getPeripheralIsConnected()) return;
        const output = new Uint8Array(message.length + 1);
        output[0] = command; // attach command to beginning of message
        for (let i = 0; i < message.length; i++) {
            output[i + 1] = message[i];
        }
        const data = Base64Util.uint8ArrayToBase64(output);
        return this._ble.write(BLEUUID.service, BLEUUID.txChar, data, 'base64');
    }
|
使用display text打印hello字符串,观察websocket传输的数据:
1
|
{"jsonrpc":"2.0","method":"write","params":{"serviceId":61445,"characteristicId":"5261da02-fa7e-42ab-850b-7c80220097cc","message":"gWhlbGxv","encoding":"base64"},"id":4}
|
这里值得一提的是编码方式:Uint8Array: Uint8Array 数组类型表示一个8位无符号整型数组,创建时内容被初始化为0
charCodeAt: 方法可返回指定位置的字符的 Unicode 编码。这个返回值是 0 - 65535 之间的整数。
硬件的通信使用的编码可能部位web开发者熟悉,我对底层编码也不熟,多是现学现用,基本也够用.说到编码,想起一本书特别赞:编码
我在BLE学习笔记有演示gatttool的使用
我们在分析了Scratch/Scratch Link与micro:bit的通信之后,使用ble工具来做些分析,我在树莓派里使用gatttool,你可可以选择其他工具
首先扫描micro:bit的地址
1
2
|
pi@cozmo1:~ $ sudo hcitool lescan
DF:48:87:86:93:20 BBC micro:bit [zuzop]
|
连接它并进入交互模式:
1
2
3
4
|
pi@cozmo1:~ $ gatttool -I -b DF:48:87:86:93:20 -t random
[DF:48:87:86:93:20][LE]> connect
Attempting to connect to DF:48:87:86:93:20
Connection successful
|
连接成功!
接着我们来看一下UART service的相关信息:
1
2
3
4
5
6
7
8
9
|
[DF:48:87:86:93:20][LE]> primary 0xf005 # 输入0xf005和f005相同,都被处理为16进制
Starting handle: 0x0013 Ending handle: 0xffff
[DF:48:87:86:93:20][LE]> char-desc 0x0013 0xffff
handle: 0x0013, uuid: 00002800-0000-1000-8000-00805f9b34fb
handle: 0x0014, uuid: 00002803-0000-1000-8000-00805f9b34fb
handle: 0x0015, uuid: 5261da01-fa7e-42ab-850b-7c80220097cc
handle: 0x0016, uuid: 00002902-0000-1000-8000-00805f9b34fb
handle: 0x0017, uuid: 00002803-0000-1000-8000-00805f9b34fb
handle: 0x0018, uuid: 5261da02-fa7e-42ab-850b-7c80220097cc
|
前头我们从源码里读到:
1
2
3
4
5
|
const BLEUUID = {
    service: 0xf005,
    rxChar: '5261da01-fa7e-42ab-850b-7c80220097cc',
    txChar: '5261da02-fa7e-42ab-850b-7c80220097cc'
};
|
可知我们的猜测完全正确!Scratch Link是个透明代理。
接着让我们来读取micro:bit的sensor数据,rxChar: '5261da01-fa7e-42ab-850b-7c80220097cc'对应的handle为0x0015
1
2
|
[DF:48:87:86:93:20][LE]> char-read-hnd 0x0015
Characteristic value/descriptor: 00 5f ff f3 00 00 00 00 00 00 00 00 00 00 00 00 00 00 00 00
|
当我们按住按钮A时读到的数据为
1
2
|
[DF:48:87:86:93:20][LE]> char-read-hnd 0x0015
Characteristic value/descriptor: 00 44 fe 57 01 00 00 00 00 00 00 00 00 00 00 00 00 00 00 00
|
多次按下和松开,并观察,我们猜测按钮存储在00 44 fe 57 01中的1这个位置上
回忆一下前头的_processSessionData函数,据此我们就弄懂了数据的编解码方式,我们可以还原出从rxChar读到的经base64编码的数据
 1
 2
 3
 4
 5
 6
 7
 8
 9
10
11
12
13
14
15
16
17
18
19
20
21
22
|
    _processSessionData (base64) {
        // parse data
        const data = Base64Util.base64ToUint8Array(base64);

        this._sensors.tiltX = data[1] | (data[0] << 8);
        if (this._sensors.tiltX > (1 << 15)) this._sensors.tiltX -= (1 << 16);
        this._sensors.tiltY = data[3] | (data[2] << 8);
        if (this._sensors.tiltY > (1 << 15)) this._sensors.tiltY -= (1 << 16);

        this._sensors.buttonA = data[4];
        this._sensors.buttonB = data[5];

        this._sensors.touchPins[0] = data[6];
        this._sensors.touchPins[1] = data[7];
        this._sensors.touchPins[2] = data[8];

        this._sensors.gestureState = data[9];

        // cancel disconnect timeout and start a new one
        window.clearInterval(this._timeoutID);
        this._timeoutID = window.setInterval(this.disconnectSession.bind(this), BLETimeout);
    }
|
我们也可以开启通知
 1
 2
 3
 4
 5
 6
 7
 8
 9
10
|
[DF:48:87:86:93:20][LE]> char-write-req 0x0016 0100
Characteristic value was written successfully
Notification handle = 0x0015 value: 00 29 00 8b 00 00 00 00 00 00 00 00 00 00 00 00 00 00 00 00
Notification handle = 0x0015 value: 00 2d 00 85 00 00 00 00 00 00 00 00 00 00 00 00 00 00 00 00
Notification handle = 0x0015 value: 00 2d 00 85 00 00 00 00 00 00 00 00 00 00 00 00 00 00 00 00
Notification handle = 0x0015 value: 00 2d 00 86 00 00 00 00 00 00 00 00 00 00 00 00 00 00 00 00
Notification handle = 0x0015 value: 00 2d 00 8b 00 00 00 00 00 00 00 00 00 00 00 00 00 00 00 00
Notification handle = 0x0015 value: 00 2c 00 8d 00 00 00 00 00 00 00 00 00 00 00 00 00 00 00 00
Notification handle = 0x0015 value: 00 2a 00 8d 00 00 00 00 00 00 00 00 00 00 00 00 00 00 00 00
Notification handle = 0x0015 value: 00 2c 00 89 00 00 00 00 00 00 00 00 00 00 00 00 00 00 00 00
|
接着试试使用pygatt+BLED112在macOS下与micro:bit通信,使用BLED112,我们可以在mac/windows/linux下与ble设备通信
 1
 2
 3
 4
 5
 6
 7
 8
 9
10
11
12
13
14
15
16
17
18
19
20
21
22
23
24
|
import time
import pygatt
adapter = pygatt.BGAPIBackend() # 使用BLED112
adapter.start() # pygatt在macOS下有bug需要hack start函数: https://github.com/peplin/pygatt/issues/159, 也可以参考:https://github.com/jannopet/LEGO-WeDo-2.0-Python-SDK/blob/master/wedo2/smarthub.py#L20

DEVICE_ADDRESS = "DF:48:87:86:93:20"
ADDRESS_TYPE = pygatt.BLEAddressType.random
device = adapter.connect(DEVICE_ADDRESS, address_type=ADDRESS_TYPE)
#value = device.char_read("5261da01-fa7e-42ab-850b-7c80220097cc")

from binascii import hexlify
def handle_data(handle, value):
    """
    handle -- integer, characteristic read handle the data was received on
    value -- bytearray, the data returned in the notification
    """
    print("Received data: %s" % hexlify(value))

    # todo 模仿前头js源码,对数据进行解包

device.subscribe("5261da01-fa7e-42ab-850b-7c80220097cc",
                     callback=handle_data)
while True:
    time.sleep(0.1)
|
运行后,输出为:
 1
 2
 3
 4
 5
 6
 7
 8
 9
10
11
12
13
|
Received data: b'00ab003600000000000000000000000000000000'
Received data: b'00ad003200000000000000000000000000000000'
Received data: b'00ad003000000000000000000000000000000000'
Received data: b'00ad003700000000000000000000000000000000'
Received data: b'00ad003700000000000000000000000000000000'
Received data: b'00ad003900000000000000000000000000000000'
Received data: b'00ad003900000000000000000000000000000000'
Received data: b'00ad003c00000000000000000000000000000000'
Received data: b'00ad003900000000000000000000000000000000'
Received data: b'00ad003700000000000000000000000000000000'
Received data: b'00ad003900000000000000000000000000000000'
Received data: b'00ad003c00000000000000000000000000000000'
Received data: b'00a9003d00000000000000000000000000000000'
|
如此一来我们就可以自己写Scratch Link了,而不必使用官方的!例如在scratch3-adapter中将microbit作为一个extension. 我最近正在将这部分写为一个python库。感兴趣的同学可以一起参与:scratch-microbit-python-sdk
接着我们来实验往microbit中写数据,我们前头提道display text积木,我们对其稍作调整,使其可在console运行,观察编码后的内容是什么:
 1
 2
 3
 4
 5
 6
 7
 8
 9
10
11
12
13
14
15
16
17
18
19
20
21
22
23
24
25
26
27
28
29
30
31
32
33
34
35
36
37
38
39
40
41
42
43
44
45
46
47
48
49
|
/**
 * Enum for micro:bit BLE command protocol.
 * https://github.com/LLK/scratch-microbit-firmware/blob/master/protocol.md
 * @readonly
 * @enum {number}
 */

var CMD_DISPLAY_TEXT = 0x81;


function Uint8ToBase64(u8Arr){
  var CHUNK_SIZE = 0x8000; //arbitrary number
  var index = 0;
  var length = u8Arr.length;
  var result = '';
  var slice;
  while (index < length) {
    slice = u8Arr.subarray(index, Math.min(index + CHUNK_SIZE, length));
    result += String.fromCharCode.apply(null, slice);
    index += CHUNK_SIZE;
  }
  return btoa(result);
}


function displayText (text) {
        const output = new Uint8Array(text.length);
        for (let i = 0; i < text.length; i++) {
            output[i] = text.charCodeAt(i);
        }
        return _writeSessionData(CMD_DISPLAY_TEXT, output);
    }

function  _writeSessionData (command, message) {
        const output = new Uint8Array(message.length + 1);
        output[0] = command; // attach command to beginning of message
        for (let i = 0; i < message.length; i++) {
            output[i + 1] = message[i];
        }
        // const data = Base64Util.uint8ArrayToBase64(output);
        const data = Uint8ToBase64(output);

        console.log(data)
        console.log(output)

        // return this._ble.write(BLEUUID.service, BLEUUID.txChar, data, 'base64');
    }

displayText ("hello")
|
hello被编码后的为gWhlbGxv,发现和前头websocket捕获的一致:gWhlbGxv
但base64应该是Scratch Link与scratch通信时的编解码方式,为了使用gatttool与micro:bit通信,我们需要猜测Scratch Linkmicro:bit里的固件是如何如何约定编解码的,关于这点,官方采取了闭源的策略,估计是有意为之,我们稍后来hack它
hello 被编码后分别为:
1
2
|
gWhlbGxv //base64
Uint8Array(6) [129, 104, 101, 108, 108, 111]  //Uint8Array
|
试着以几种方式将他们转为16进制,都没有成功在micro:bit中显示
1
|
char-write-cmd 0x0018 xxx
|
这导致我们需要使用一些嗅探工具抓包(BLE Sniffer),之后用wireshark来分析,不过我手边暂时没有相应硬件,准备淘宝上买一个
破解纯粹出于好玩,我们理解了官方的思路之后,自己重写一个micro:bit固件和是适配器也许比破解来得简单.使用makecode可以很轻松把gatt服务都搭了出来, 参考:scratch-microbit-extension
—2018年8月2号更新—
我昨晚回去路上一致在想如何在没买到嗅探工具之前,进行破解,网购到货得几天,路上想到几个策略,洗澡的时候又想到几个策略,兴奋不易,可惜晚上没带电脑和树莓派回去,没法做实验
我想到的策略有:
- 观察micro:bit ble 的extension是如何将Uint8Array数据write到txChar,这个extension不包含Scratch Link,源码都在js中,所以即便加密,策略也可以被看出,而micro:bit固件不太可能重写,如果弄清楚micro:bit ble 的extension的机制,估计就能hack官方的机制
- 使用树莓派伪装成micro:bit,从js可以可以看出,只要能自定义service uuid就可以骗过官方插件,于是引诱它将数据写入树莓派中,如果有加密,有了加密前后的数据,就可以猜测加密的规则。但这样做的一个风险是Scratch Link可能会检验sensor数据的合法性(我在scratch3-adapter中就考虑了这个机制),如果不合法,可能会断开连接。当然这些需要做实验才知道
- 等待官方完成wedo2的插件,由于它们共用Scratch Link,如果有加密,加密的机制很可能被抽象得一样,而wedo2已经被破解了,所以可以逆向分析出micro:bit部分的加密方式
今早一来试了下第一条猜想就成功了,事实证明我想多了,官方并没有做加密
我们来看看在micro:bit ble extension中,官方是如何发送display text数据的
 1
 2
 3
 4
 5
 6
 7
 8
 9
10
11
12
13
14
15
16
17
18
19
20
21
|
displayText (args) {
        const text = String(args.TEXT).substring(0, 19);
        const output = new Uint8Array(text.length + 1);
        output[0] = BLECommand.CMD_DISPLAY_TEXT;
        for (let i = 0; i < text.length; i++) {
            output[i + 1] = text.charCodeAt(i);
        }
        window.postMessage({type: 'command', buffer: output}, '*');
        return;
    }

window.addEventListener('message', (event) => {
    if (event.data.type === 'command') {
				txChar.writeValue(event.data.buffer);
    } else if (event.data.type === 'status') {
        if (event.data.status === 'connected')
            document.getElementById('gui.menuBar.bluetoothIndicator').src = greenIndicatorIcon;
        else if (event.data.status === 'disconnected')
            document.getElementById('gui.menuBar.bluetoothIndicator').src = orangeIndicatorIcon;
    }
}, false);
|
可以看出官方啥也没做: txChar.writeValue(event.data.buffer);
我们从简单的字符串分析入手,先试试a
websocket显示从前端发往Scratch Link的是:
1
|
{"jsonrpc":"2.0","method":"write","params":{"serviceId":61445,"characteristicId":"5261da02-fa7e-42ab-850b-7c80220097cc","message":"gWE=","encoding":"base64"},"id":3}
|
在前端被编码后结果分别为:
1
2
|
gWE= //base64
Uint8Array(2) [129, 97]  //Uint8Array
|
我们只需要把buffer转为hex就行
1
2
3
4
5
6
7
|
function buf2hex(buffer) { // buffer is an ArrayBuffer
  return Array.prototype.map.call(new Uint8Array(buffer), x => ('00' + x.toString(16)).slice(-2)).join('');
}

// EXAMPLE:
const buffer = new Uint8Array([129, 97]).buffer; // display a -> [129, 97]
console.log(buf2hex(buffer)); // = 8161
|
在树莓派的gatttool中:
1
|
[DF:48:87:86:93:20][LE]> char-write-cmd 0x0018 8161
|
大功告成!
tips
记录一些scratch团队的机智做法
连接设备
startDeviceScan
用户选中extesion之后开始连接,只扫描出extension对应的设备,而不是把周围的BLE都扫描出来,体验十分友好
https校验问题
由于网站都逐渐过渡到https,而Scratch Link是个本地websocker server,要让Scratch Link与浏览器通信,需要使用wss协议。而本地websocker server采用openssl本地自生成的证书的话,浏览器要让用户在一个新页面里点击高级设置才行,体验很不友好
scratch团队的解决方案十分聪明, 让device-manager.scratch.mit.edu这个域名指向127.0.0.1,websocker server就可以使用这个域名的证书。
Scratch Link的内部服务怎么写
ScratchLinkWebSocket对应的server为'wss://device-manager.scratch.mit.edu:20110/scratch/ble'
BLESession的定位是:
A BLE device session object. It handles connecting, over web sockets, to BLE devices, and reading and writing data to them.
看去是透明代理
所以根据js的接口,要独立实现Scratch Link应该不难
参考