Home Assistant 折腾笔记
文章目录
前言
折腾Home Assistant过程的中做的笔记。
写作本文时基于的环境为:
- MacOS 10.13.5
- Python 3.7.2
- homeassistant==0.94.2
安装
有很多种安装方式可以安装Home Assistant。
对于开发调试而言,直接使用pip安装是最方便的(最新的版本建议用Python3.6以上来安装)
如果计划将Home Assistant产品化,Hass.io可能是最佳方案。Hass.io利用docker、树莓派将Home Assistant打包进容器(当然也可以跑在其他linux发行版里),如此一来,升级、备份、管理、添加组件变得简单。
Hass.io
Hass.io基于hassos,而hassos基于buildroot,buildroot允许你轻松构建裁剪版的嵌入式Linux。
这一块依然有许多可以做的工作,诸如更好的远程管理(balena.io提供了很好的思路和方案),更好的WiFi管理:wifi-connect。对于home-assistant的产品化,Hass.io给出了绝佳的思路。
配置文件
配置文件都在~/.homeassistant里,在Home Assistant 与 Yeelight彩光灯泡的通信过程分析一文里,我们分析了默认配置文件的生成过程。
配置文件列表为:
|
|
可以看到有两个隐藏目录: .cloud和.storage, 里头存储一些用户私有数据。
configuration.yaml
是日常用到的配置文件, 相关文档参考Configuring Home Assistant
如果你采用hass.io安装home-assistant,web页面将自带hass-configurator,允许你从web页面编辑configuration.yaml(以及~/.homeassistant里的所有文件)
数据库
home-assistant_v2.db是sqlite数据库。可以使用DB Browser for SQLite打开。
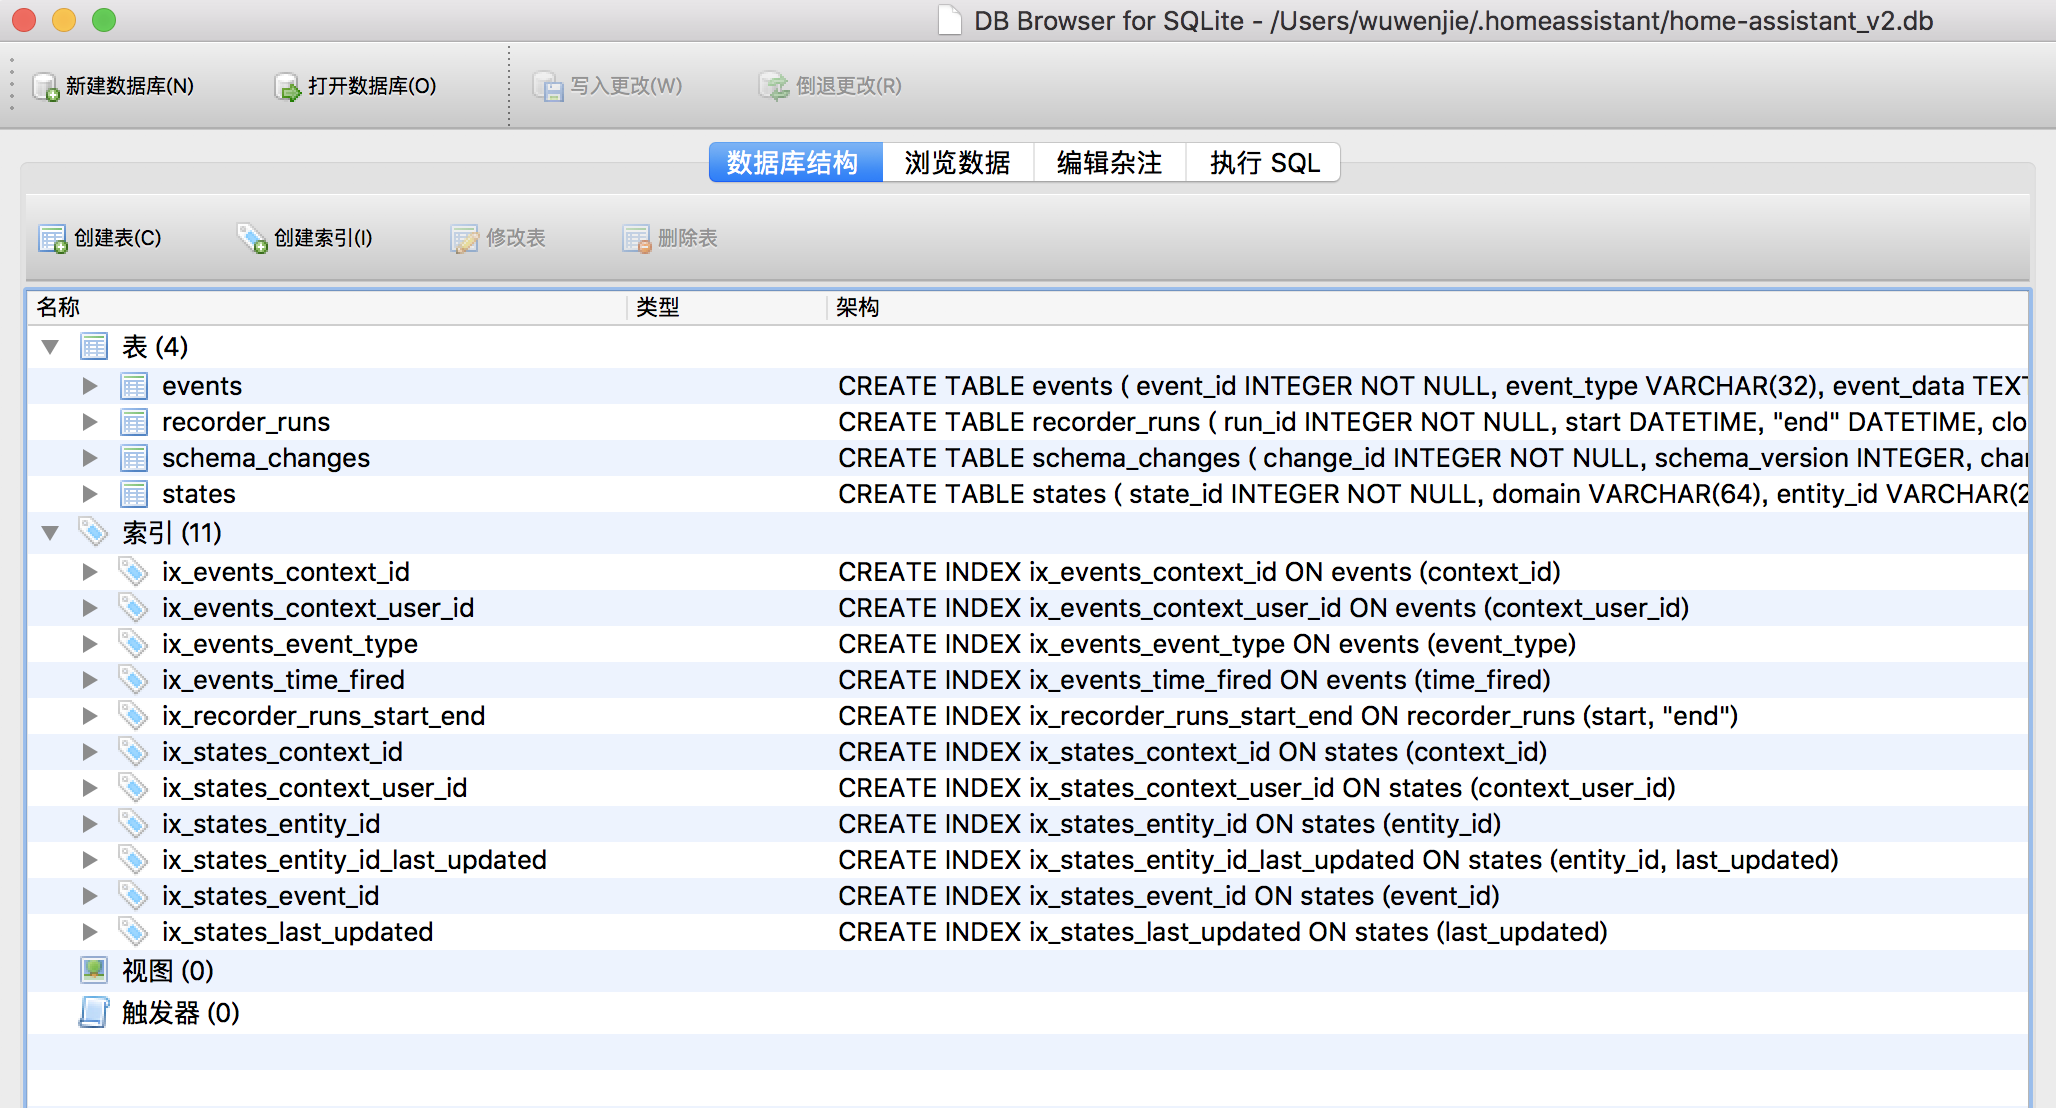 , 可以看到这里头有四张表。
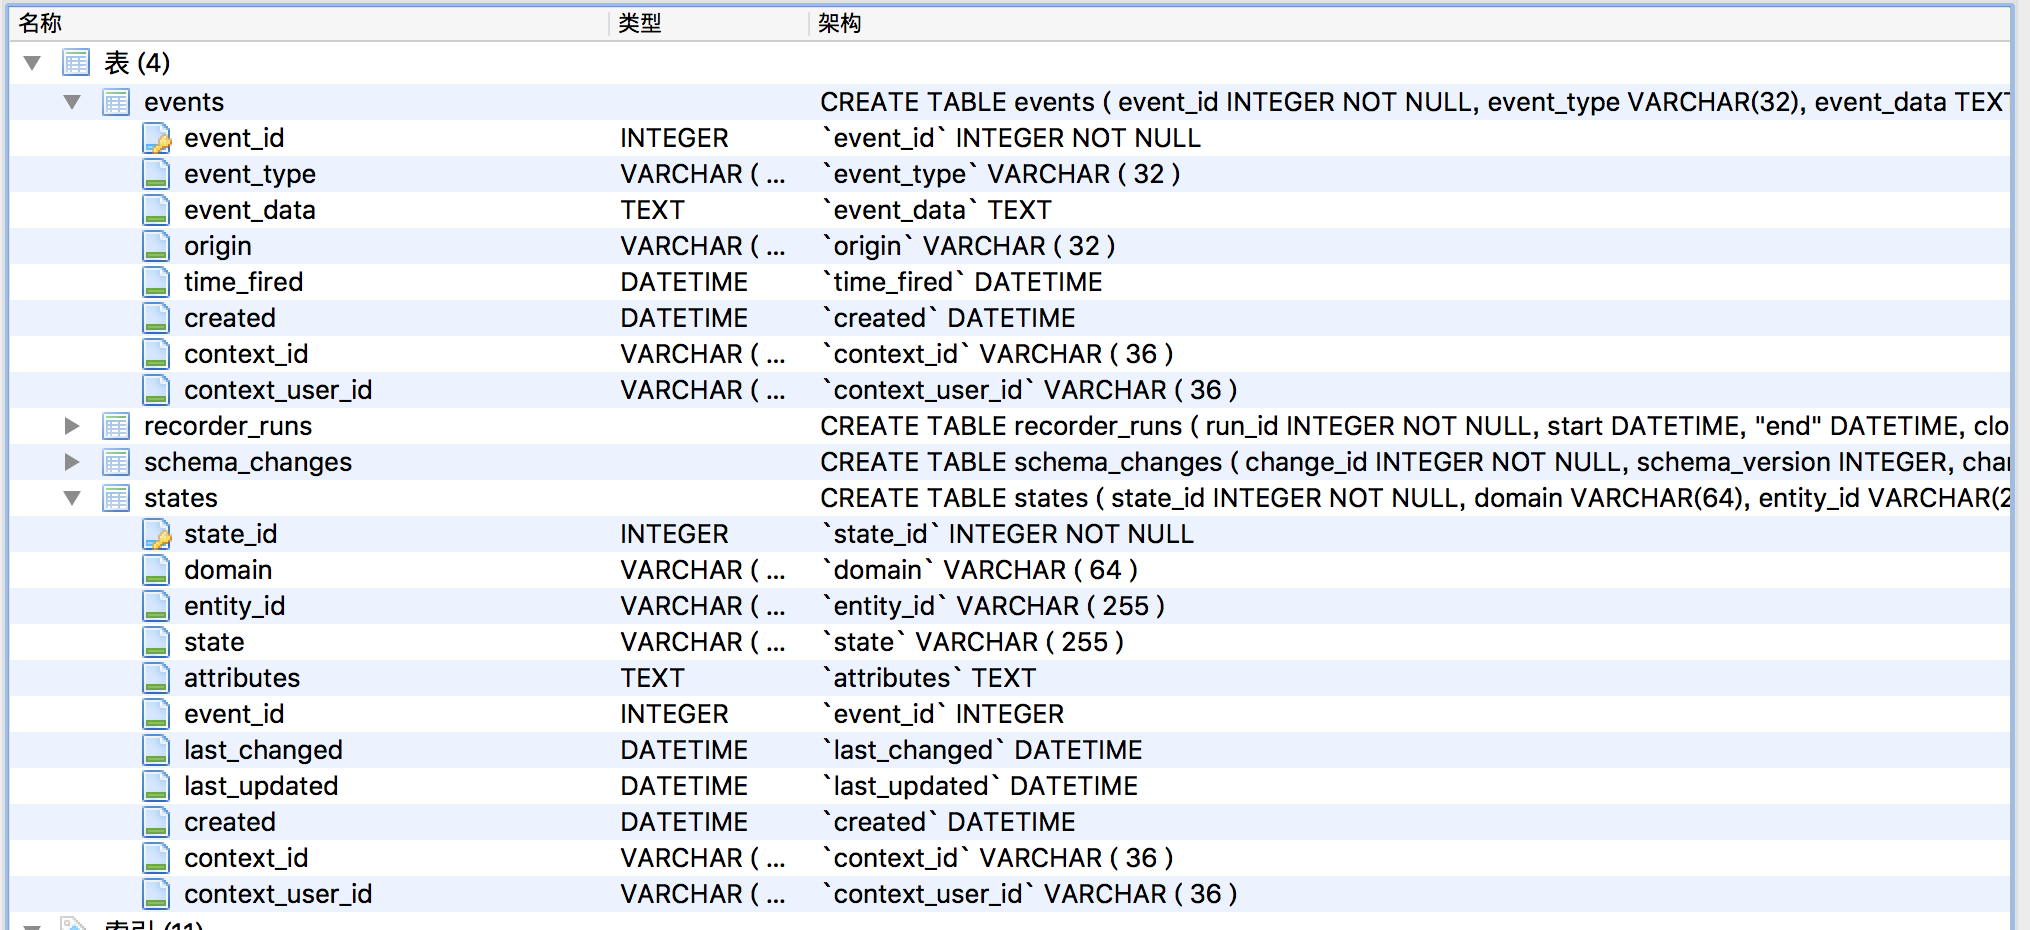
其中events和states的表结构值得关注,这两张表的结构,很能反映home-assistant设计的领域原语。
.storage
.storage目录里有很多用户相关的信息,包括用户的登陆信息(用户名/密码,加密后存在auth_provider.homeassistant文件中)。这可能有些反直觉,home-assistant没有将这些信息放在数据库,而是放在一个隐藏目录里。
自定义设备(entity)名
用户可以在web页面自定义设备名。
这些信息存储在.storage目录下的core.entity_registry文件里。
更新设备名称时,会触发一条websocket消息。
|
|
handle消息的函数为websocket_update_entity
我们进一步跟踪HA是如何更新.storage文件的
及时生效
基于文件的存储如何做到及时生效呢?
在分析文件如何写入时,我们也看到异步读取配置文件的操作。
多用户
HA支持多用户,目前用户角色分为管理员和普通用户。这块的功能还在增强中。
目前还没有为角色分配设备的管理机制。
权限系统也尚未构建,对此有兴趣的朋友可以参考理解权限系统。
开发者工具
HA在web面板里为开发者提供了一组开发工具:
/dev-service: 服务/dev-state: 状态/dev-event: 事件/dev-template: 模版/dev-mqtt: MQTT/dev-info: 信息
Home Assistant Cloud
Home Assistant Cloud提供安全的远程连接,允许你远程控制设备(在你外出的时候),也允许Amazon Alexa and Google Assistant控制Home Assistant实例.
目前该服务由Home Assistant的合作伙伴Nabu Casa, Inc提供。Nabu Casa, Inc由Home Assistant 和 Hass.io的联合创始人创建。
Nabu Casa
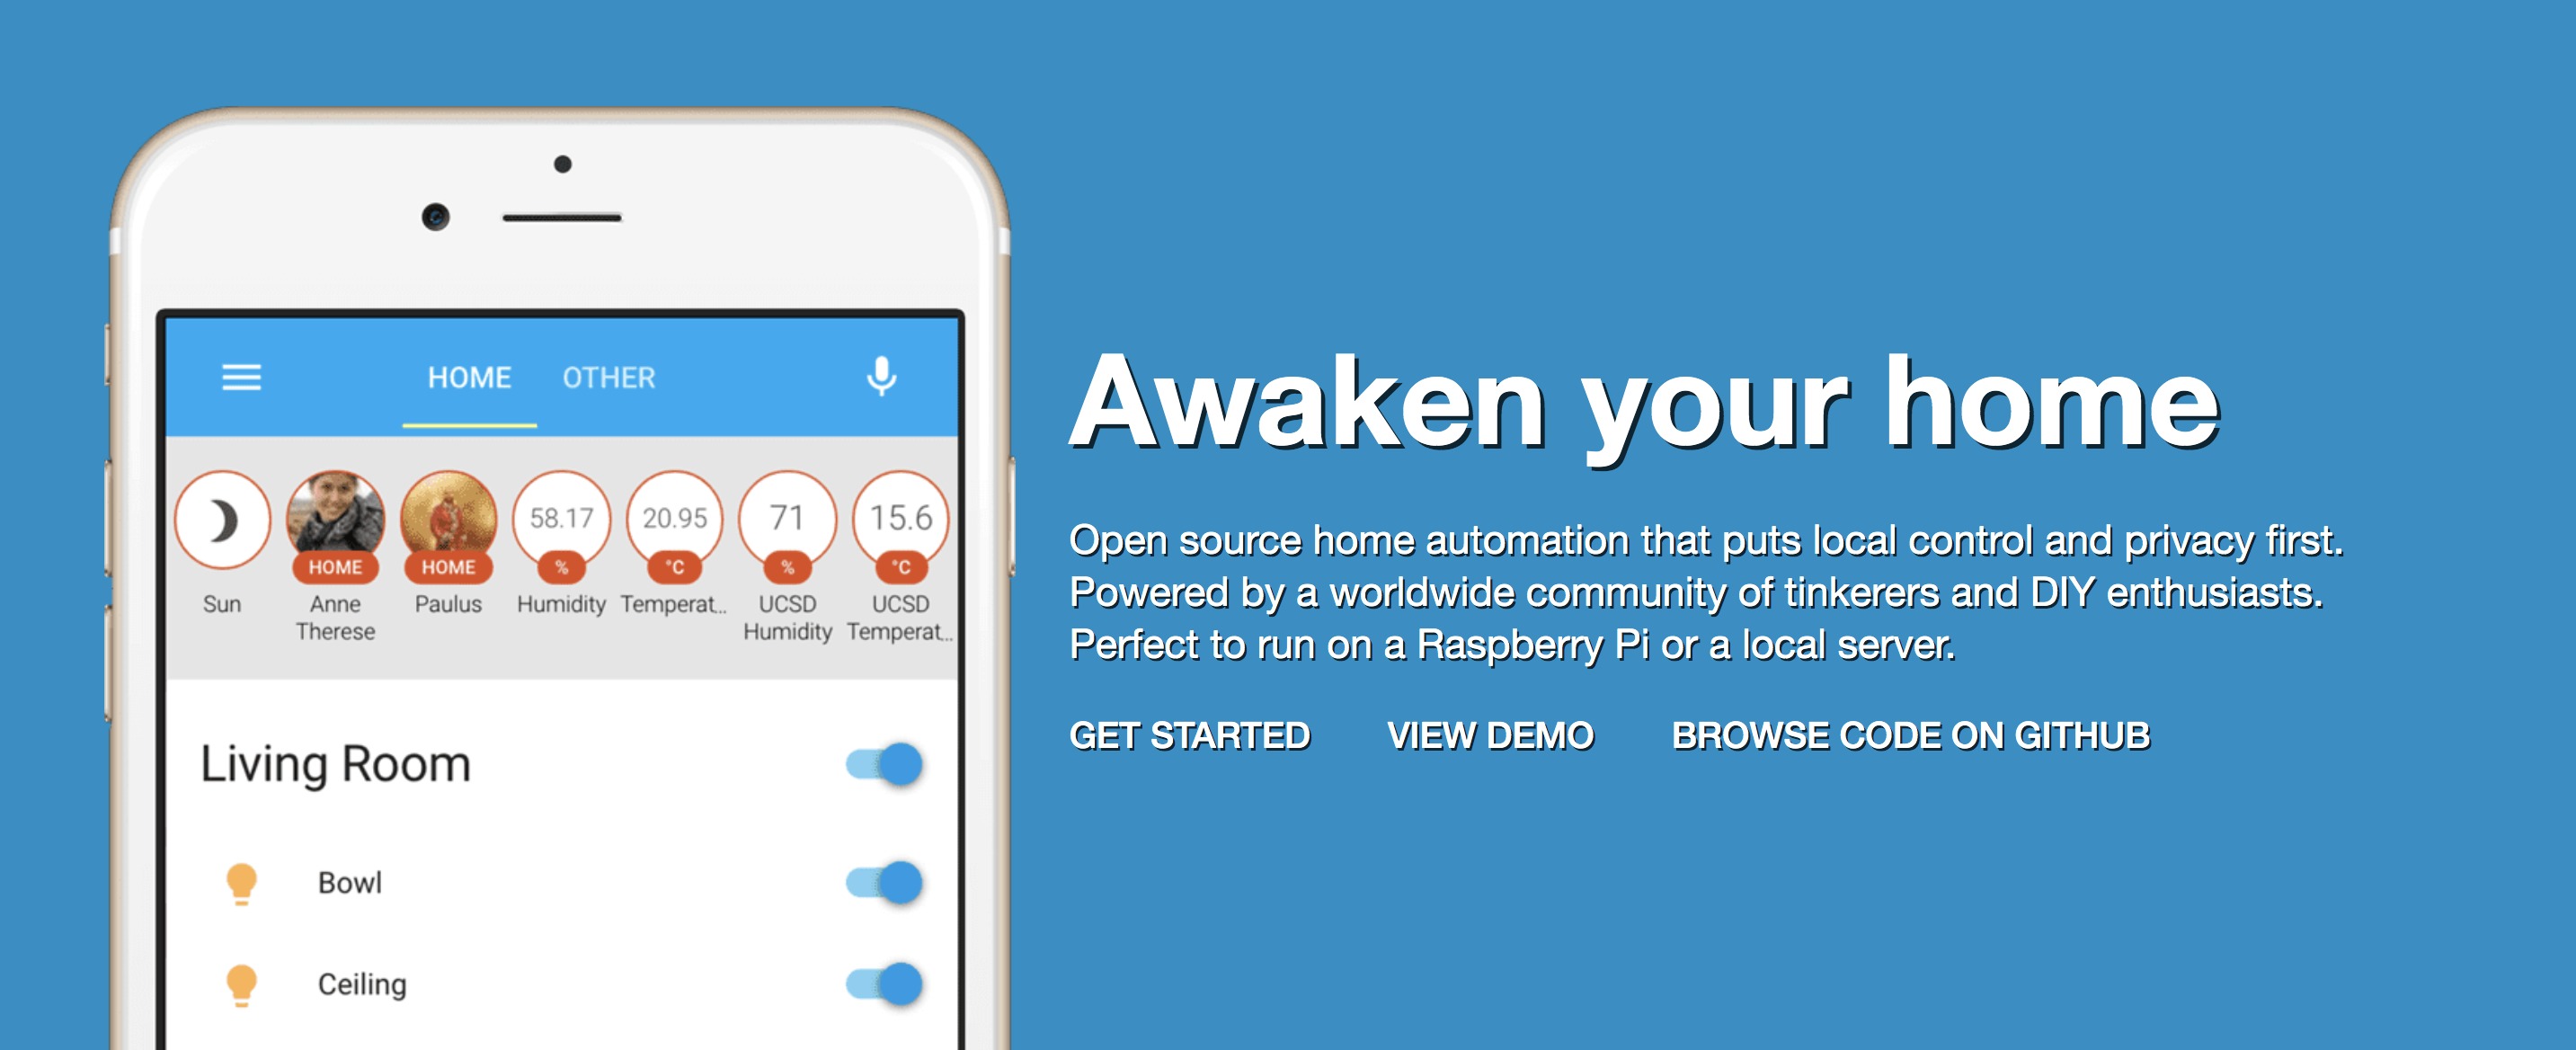
The missing cloud piece for Home Assistant, by the founder of Home Assistant. Control your Home Assistant from anywhere. Fully encrypted.
All data is fully encrypted between your device and your Home Assistant instance. No snooping.
Nabu Casa秉承Home Assistant的理念:隐私优先, 同时它也为用户带来远程控制的便利。鱼和熊掌可以兼得。
我非常喜欢主页上的这段话
|
|
如何做到这点呢,Nabu Casa在privacy里做了说明,策略就是: 开源!
首先home-assistant是开源的,此外nabucasa client是开源的:nabucasa。
对于hass_nabucasa的交互逻辑,可以从测试代码中学习:test_cloud_api.py
我的cloud
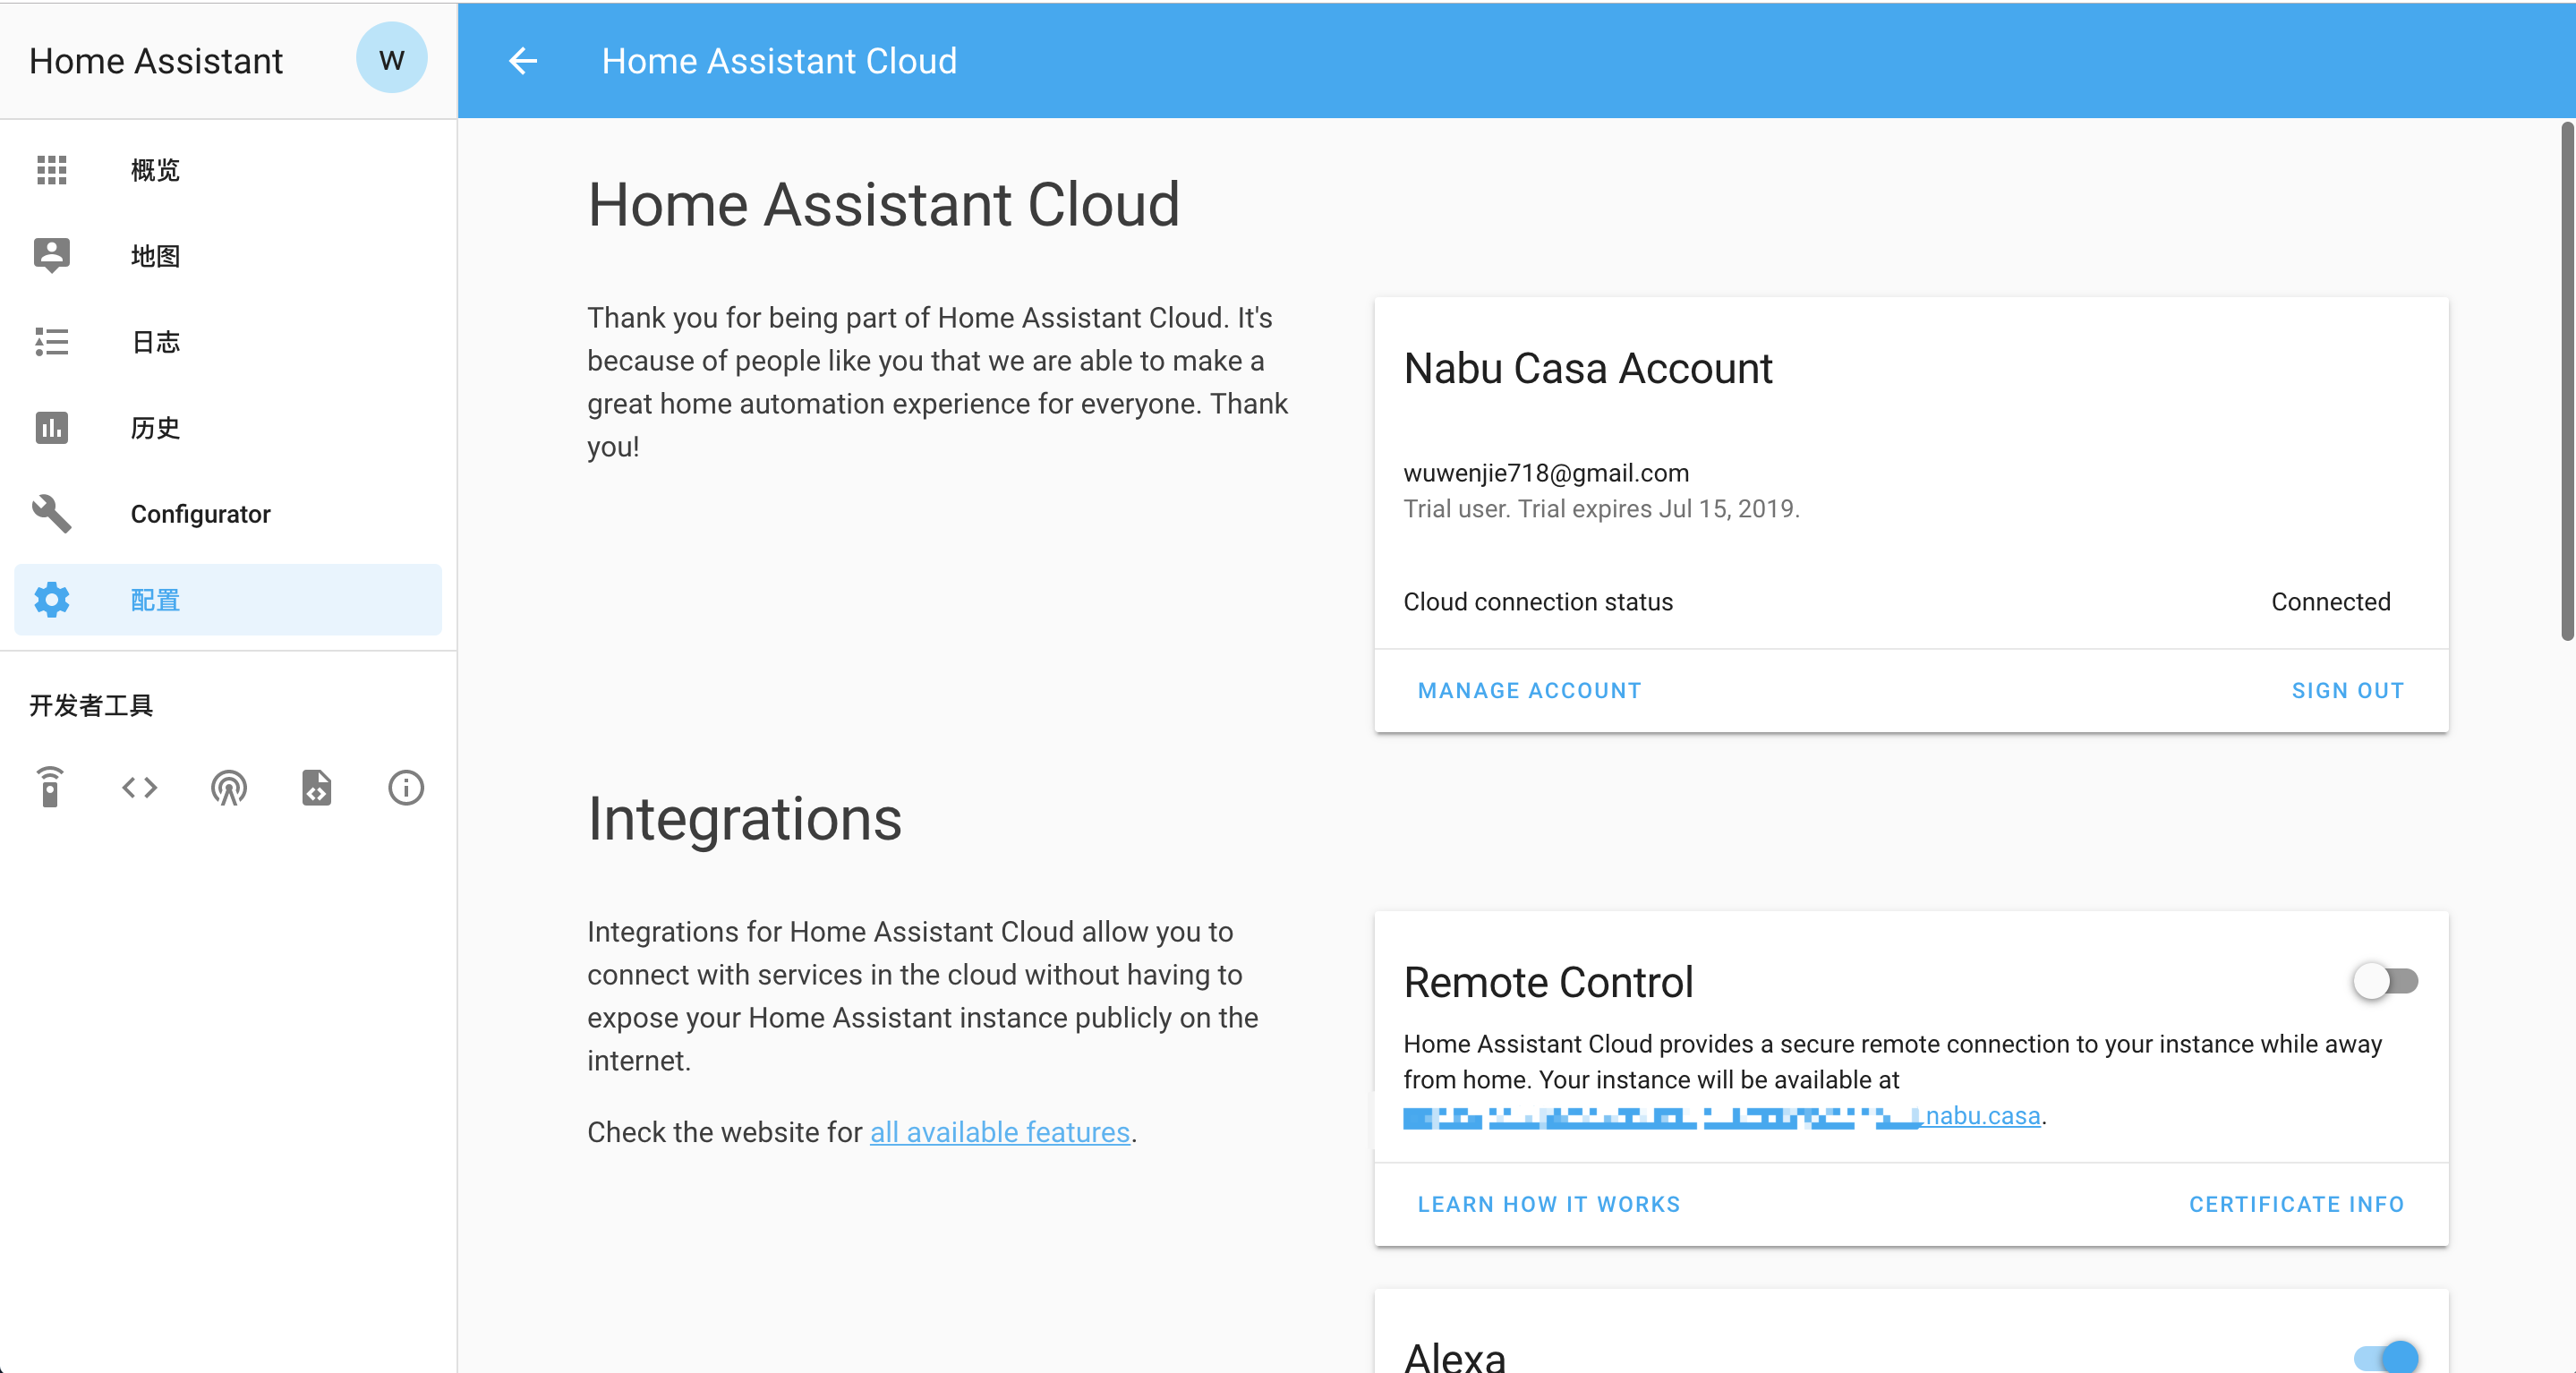
这是我接入Nabu Casa云端之后的HA cloud页面。
当我打开Remote Control, 即可点击页面上的链接,进入远程控制页面,没有任何配置!与本地打开HA没有任何不同。
有了公网可访问的入口,更多的webhook就可以在集成里打开了!
开放生态
Home Assistant是个开放生态,其他厂商应该也可以提供Home Assistant Cloud服务。
近期如果有时间,准备对其做个更细致的技术分析。目前来看,只要实现nabucasa即可提供服务。
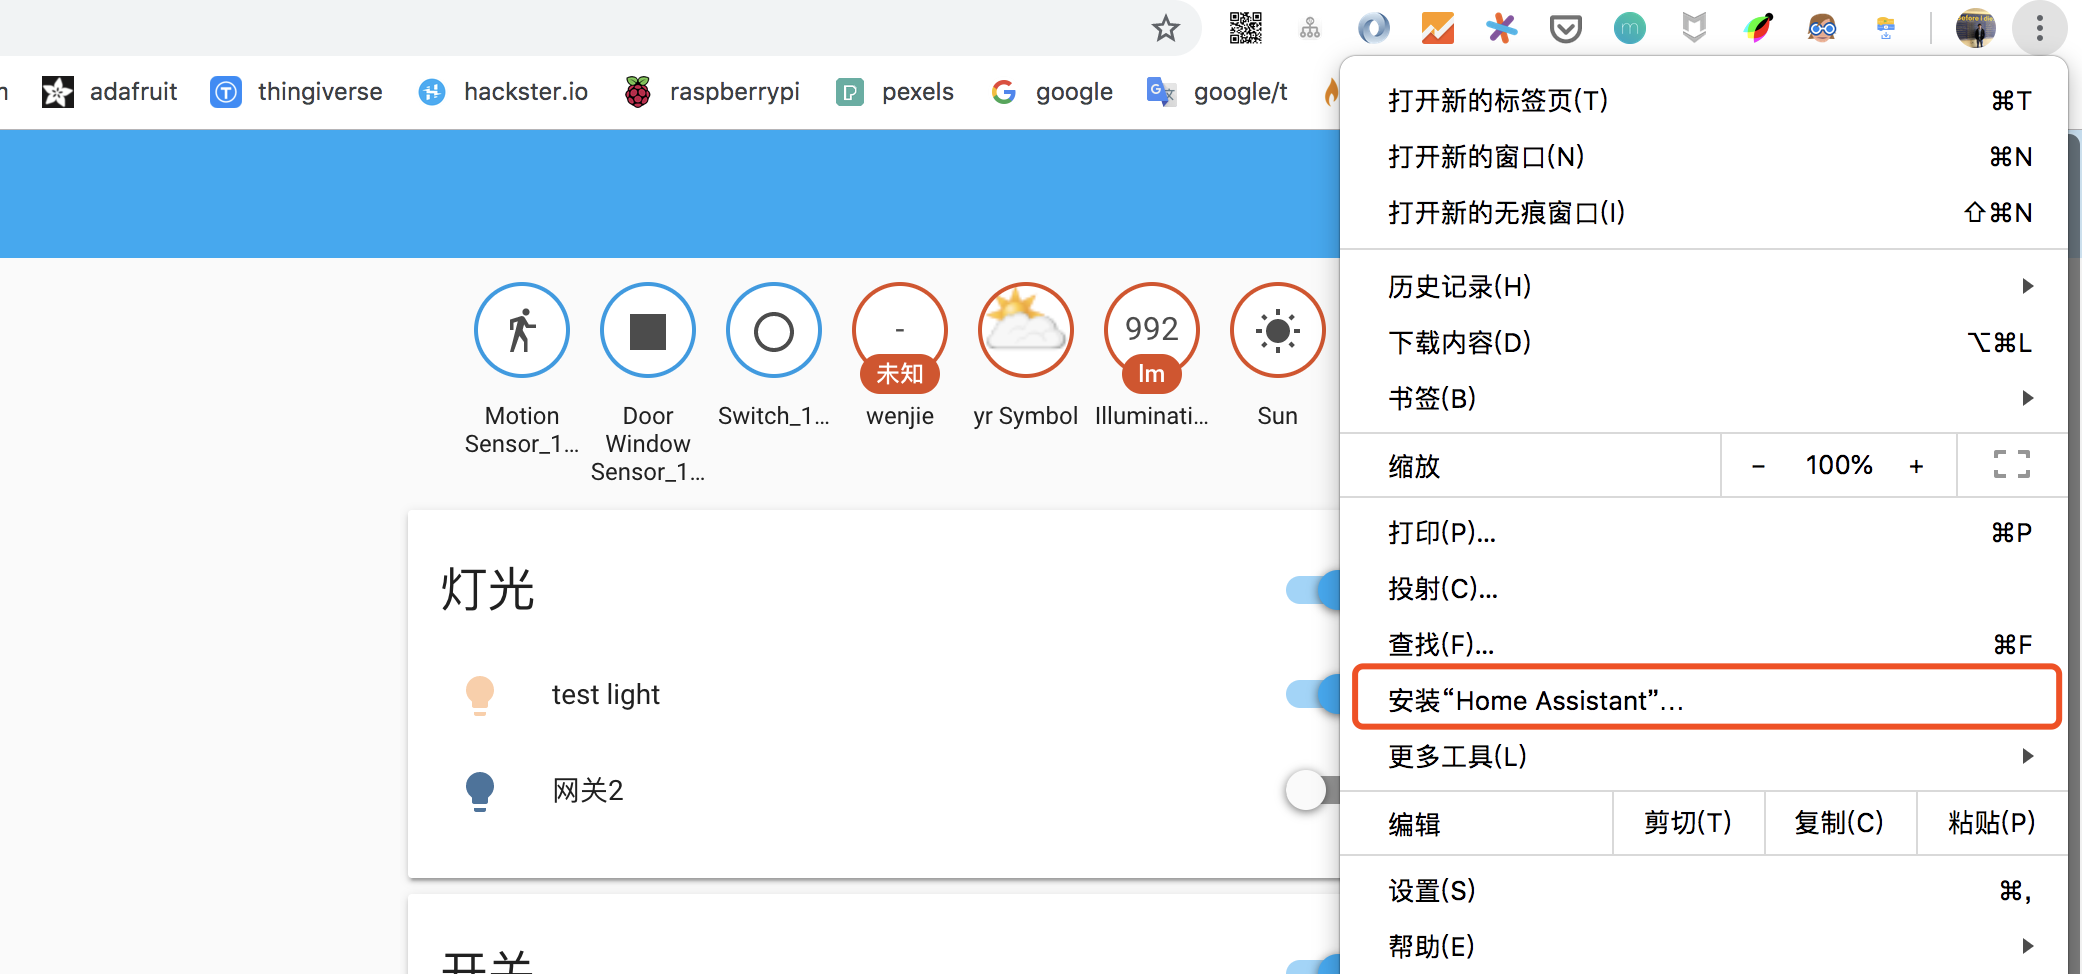
桌面应用
可以添加为chrome应用(在chrome设置中),之后像APP一样拖拽到桌面,对于交付很友好。
文章作者 种瓜
上次更新 2019-06-13